dawsopenat7
Showing posts with label Compression. Show all posts

Wednesday, 16 November 2016

Knowledge Wednesday

This week's Knowledge Wednesday tip is to try starting your next mix by working into a mix buss.

Many home studio engineers including myself have worked on mixes in the past, spending time carefully attending to all the sounds that make up the mix only to come to the end of it, add what we think will be subtle changes and then suddenly what we set out to achieve has just become wildly different and moved the goal post again.

It is a common practice to mix into a working mix buss, but it's just at what point you discover this and try to implement it into your workflow.

To give you some idea of what I have on my mix buss for a typical rock mix - I use console emulation, tape saturation, EQ, compression and a limiter. They are all contributing small amounts to the 'bigger picture' and these decisions are what bring together the tens of hundreds of tracks that can be present in a session.

If you are looking for editing, mixing or mastering services, head over to www.jwaudioproductions.co.uk and get in touch via the contact page.


Knowledge Wednesday

This week's Knowledge Wednesday tip is to always remember to use the makeup gain on a compressor to match the output level with that of the input level.

If you've spent time balancing all your instruments and getting the right levels, don't make your work go to waste by using the make-up gain on the compressor and then losing track of the output levels before you added the compressor.

Matching the output level when using a compressor is all part of good gain staging.

If you are looking for editing, mixing or mastering services, head over to www.jwaudioproductions.co.uk and get in touch via the contact page.


Wednesday, 28 September 2016

Knowledge Wednesday

This week's Knowledge Wednesday tip is to try out Serial Compression.

Serial Compression is using two or more compressors on one signal chain to achieve a desired a effect which may sound better with them acting differently to the same audio signal.

For example, on vocals I like to use an 1176 style compressor as the first mode of compression and use it to handle the faster transients of the signal. I then like to add a LA-2A style compressor, typically a slower attack style compressor to smooth the overall performance and maintain a more consistent level.

Be careful though as it is very easy to over-compress and create a performance that has no dynamic range at all, however this may be your goal and as ever, the topic is subjective. The best way to learn is to try it for yourself and listen to the results.

Try out Serial Compression on your next mix and remember that vocals is just an example of something you can use it on.


Sunday, 21 August 2016

Multi-band Compression on Bass Guitar

Compression on bass guitar is a very subjective and contextual topic due to the many different types of acoustic and electric basses, not to mention the difference in playing styles and dynamics. So, for this post I'm going to focus on compression for rock and metal bass guitar and my goal is to achieve a consistent low end with a controlled attack.


The tool I often choose to use to compress bass is a multi-band compressor because this gives me independent control over specific frequency bands, meaning I can compress the the lows differently to the mids and so on.

I firstly create a section in the multi-band compressor which contains the frequencies between 40Hz and 120Hz. I then set a fast attack and a slightly slower release, usually with a low ratio of 2:1 and pull the threshold down until the compressor starts to work. I use a fast attack and a slower release because i don't want any peaks in the low end and i want to keep the compression smooth. Depending on how inconsistent the low end is, I usually aim for 3-6dB of gain reduction. Once this is complete, I use the make-up gain to match the level that was audible before the compressor was engaged.


I'd like to point out that sometimes, compressing the low end is as far as I go with bass compression and sometimes I'll apply a single band compressor like an LA-2A just to even out the dynamics.


When dealing with an aggressive picked bass, I will usually add a second band into the multi-band compressor to even out the pick attack. I use a slower attack in this range to retain some of the transients and then apply a fast release so that the compressor recovers in time for the next transient. I normally go for a ratio of 3:1 or 4:1 and pull down on the threshold so that the compressor is consistently working on the pick attack. Again, I apply the appropriate make-up gain.


Multi-band compression is not the be all and end all to processing bass, it is simply an option and one that you may decide to take depending on the source tone you are working with.


If you are looking for editing, mixing or mastering services, head over to www.jwaudioproductions.co.uk and get in touch via the contact page.

Wednesday, 17 August 2016

knowledge wednesday

This week's tip is to try using an EQ before a compressor in your channel strip.

The goal of this is quite simple - to control the frequencies that are going into the compressor for example, you will want to remove problematic resonant frequencies before hitting the compressor otherwise the compressor could be overly reactive to these specific areas and you may not be able to achieve your desired result.

Sculpting your sound with EQ first ensures that your compressor will only react to the frequencies you want it to.

Sunday, 14 August 2016

Mix Templates

Using mix templates is something i use in the production of my music as well as other clients and in this post, i want to explain the benefits of doing this and hopefully give you a strategy to implement into your own productions.

Keep in mind that in order to utilise a mix template, you firstly need to put the time into creating one.


I firstly start with the drums and depending on whether they are acoustically played and recorded or programmed and sampled, i like to have my channels already set up so that the the kick-in goes to channel 1, the kick-out goes to channel 2, the snare top goes to channel 3 and so on. I also create a drum buss and a parallel drum buss ready for compression and blending. As well as this, I apply console emulation across all the channels and leave them engaged all the time. I like to insert some of my go-to plugins such as the Fab Filter Pro-Q2 EQ, Waves CLA-76, Fab Filter Pro-C2 Compressor, Slate Digital Virtual Tape Machine and Slate Digital Virtual Buss Compressors onto specific channels and busses to prep them for tweaking. I'd to mention that on certain instruments, i have presets saved within the plugins that i like engage to get me into the ball-park of the sound i'm listening for.

I then move onto the bass guitar, keeping it quite simple i create an amp channel and a DI channel, as well as a couple of auxiliary channels for different types of saturation and distortion, should i wish to use them. Similarly to the drums, i like to insert console emulation and a basic EQ and Compressor to get me started. Once I've done this, i create a bass buss so that i can monitor and control the level on one fader.

Next i focus on the guitars and these are very simple for me, i use console emulation and a basic EQ that has a high pass and low pass filter applied to remove some of the unnecessary frequencies. I then create a guitar buss which i apply some gentle tape saturation to. Sometimes, i will use 2 or 3 different busses if i have a lot of rhythms, leads and clean sounds present in the mix to give me greater control.

For vocals, i load up some console emulation, a De-Esser, compressor and a basic EQ with a high pass filter engaged to remove the unwanted low end. Depending on the song, i usually start off with an 1176 style compressor or sometimes i like run parallel compression or even series compression utilising an 1176 and an LA2A style compressor.

Finally, i create a couple of auxiliary channels with reverb and delay effects engaged so that they are there for vocals, guitars or drums to be sent to as and when i get to the state in the mix where i'm wanting to apply effects.

The very last thing i do (sometimes it's actually first) before i start mixing is create a mix buss and this contains console emulation, gentle tape saturation, compression and a limiter to ensure that no peaks creep through. At this point the limiter is doing nothing but ensuring that nothing clips, i do not use it to increase the level of the song.

Once i've done all this, i save it as a mix template and label it accordingly.  

I like to utilise mix templates with clients projects particularly when they are looking for consistency across an album because it's a way of mapping out the sounds that i may have already achieved in one session and then i want to apply that across the other songs. It doesn't mean the sounds strictly have to be the same, i still adjust the compressors, adjust the EQs and apply higher or lower values of saturation, but the point is that it's giving me the most positive and constructive start to a mix.

I also like to use a variation of mix templates in the production of my own music because it allows me to hear the finished product much quicker and keeps me inspired during the times that i'm writing and tracking parts.

Considering using mix templates going forward with your own work and if you are doing work for other people, you will find that you will save time, improve your work flow and achieve more consistent results.

If you are looking for editing, mixing or mastering, head over to www.jwaudioproductions.co.uk and get in touch via the contact page.


Sunday, 7 August 2016

Parallel Compression on Drums

In this post, I'm going to cover parallel compression on drums and how I use the technique in some of the mixes I do.  

Let's consider that your individual drums are mixed and sounding the way you want them to but they just aren't quite cutting it in the overall mix, something is missing...enter parallel compression. 

The first thing I do is send each track to an auxiliary channel, which is what will have the compression on. I send these pre fader so that any adjustments on the individual tracks (levels or plugins) don't affect the auxiliary channel. Some people like to send everything all at the same level, but personally I like to control the levels before hitting the compressor.  

I usually have the kick send between -10 to -15dB and this because I don't want it to dominate the compressor and cause heavy a heavy pumping effect. I leave the snare and toms a 0bB because these are two major elements of the drums that I want to accentuate with the compressor. I keep the overheads send quite low as well between -8 to -12dB because I don't want overly washy cymbals. Finally, the room mics are sent between -5 to -8dB, just enough for the sound of the snare and toms in the room to be caught by the compressor and minimising some of the cymbal sound. 

I've now achieved the blend of drums that I want the compressor to work on. The compressor plugins I use vary between the Waves CLA-76, API 2500, FabFilter Pro C2 and Slate Digital Buss Compressors however, the principles are the same whichever I choose to use. 


I start with the attack which I set to the fastest setting possible to ensure that all the transients are being squashed consistently. I then move onto the release and apply a fast setting (slightly slower than the attack to avoid distortion) so that the compressor recovers quickly in time for the next transient.  

I usually set a high ratio, anything between 6:1 to 20:1 and then pull down the threshold and listen to the compressor working, usually aiming for -10 to -20dB of gain reduction. Once I've achieved the sound I want, I make sure I've used the make-up gain appropriately to make sure the output level is matched to the level of the input (this is easily checked by bypassing the compressor). I then blend the auxiliary channel in with my main drum tracks to taste.


Something else I like to do on the auxiliary channel before hitting the compressor is add an EQ with a low and high shelf. I usually add about 3-4dB on each end of the spectrum to create more of a HI-FI sound as this is what I want the compressor to react to the most.


Parallel Compression, also know as New York Compression enables you to achieve a greater sustain and character on the drums and ultimately gives them that 'larger than life' sound that helps solidify the foundation that they set for a song. There's no limit to how much parallel compression can you be used in conjunction with your main drum tracks however, I recommend blending the effect in whilst listening to the whole mix so that you know whether you have achieved the best balance. 

If you are looking for editing, mixing or mastering services, head over to www.jwaudioproductions.co.uk and get in touch via the contact page.

Monday, 4 July 2016

Mix Buss Compression On or Off Before Mastering?

Don't be afraid to use mix buss compression even when you're about to send off to a mastering engineer.


Mix buss compression is a very common part of mixing and it is very useful for gluing everything together and accentuating the overall energy of a track. 


When preparing the audio to ship out to the mastering engineer you may wonder whether you should disable the mix buss compression or leave it on. Honestly, the vast majority of mixes that are mastered already have some amount of compression because it is used to pull everything together, create the desired feel and ultimately add extra musicality to the mix. 


The thing to generally avoid with using mix buss compression is relying on it to increase the level and achieve the loudness that is best left to the mastering engineer. 


If you are unsure on how much compression you can apply before sending to the mastering engineer, try a few versions with different amounts of compression and see which works best. If you're still unsure from there, the best thing to do is get in contact with the mastering engineer or studio you are going to use and ask what they expect from you or advise you to prepare the track in the best possible way for mastering. 


If you were contacting me regarding mastering then I would be happy to work with a mix that has buss compression on because this is what I'm used to, but should there be any issues I would always communicate with you as the client to ensure I am mastering the best version of your mix that you are certain to be happy with. 


If you have any current or upcoming projects that require editing, mixing or mastering, I would love to hear from you over at www.jwaudioproductions.co.uk. You can get in touch via the contact page. 

Friday, 10 June 2016

Parallel Compression on Drums - Demonstration

Check out the below video to see the impact of parallel compression on drums. Keep in mind that this is camera mic audio but you can still hear the difference!


For any editing, mixing or mastering enquiries, head over to www.jwaudioproductions.co.uk and get in touch via the contact page.


Wednesday, 1 June 2016

Knowledge Wednesday

Weekly words of wisdom

Remember when using compression to match the output level to that of the input level, this is done using the make-up gain usually present on all plugin compressors. This can be checked simply by bypassing the compressor and listening to the level with and without the plugin applied. Repeat this process until the level is matched.

Its important to match the gain levels as you've probably spent a lot of time and effort on proper gain staging and that can easily be reversed with too much output gain from a compressor. As well as this, you will not be able to accurately judge what the compressor is doing to your audio signal if the level is louder with the compressor on. Your ears can easily be tricked into thinking something is better because it's louder, so ensure you match the gain coming out of your compressor to what is going in.

For any editing, mixing or mastering enquiries, head over to www.jwaudioproductions.co.uk and get in touch via the contact page.
Monday, 30 May 2016

Using a limiter on the mix buss, is it a good idea?

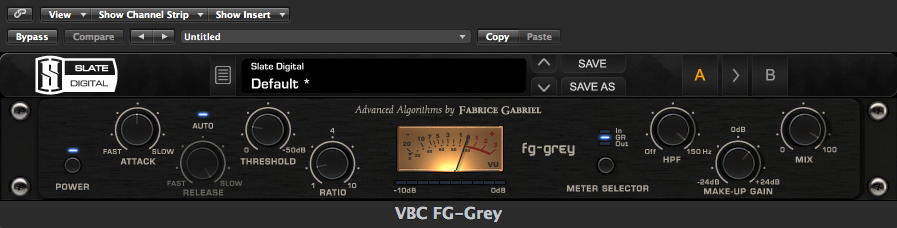
If there are any rules in mixing, one that is certainly worth going by is to not use a limiter on your mix buss.

I have used a limiter on my mix buss before and I'm going to explain why I don't do it anymore and how things got much easier once I stopped fighting it.

A limiter is simply a compressor with a very high or infinite ratio and is built to prevent peaks in an audio signal as well as limiting the dynamic range, allowing you to increase the overall dB level of the mix.

Because a limiter can shape the dynamics in a mix so much, this can cause problems if you are still in the mixing process and trying to make accurate decisions, especially with individual instrument compression. The main problem with trying to mix with a limiter on your buss is that it will warp your perception of the dynamics and characteristics.

Depending on the kind of audio material you are working with, your goal is likely to be to achieve a punchy mix and this is where your reliance on compression should be. Keep the limiter off your mix buss and no it won't be loud whilst you are working, but you can always turn up your studio monitors to compensate for this.

In the past i used a limiter on my mix buss, but i found i wasn't able to use compression properly and my judgement of transients wasn't entirely accurate because in some cases, they were already been reduced by the limiter and this seriously affected the way i compressed certain instruments. Since then, I have never used a limiter on my mix buss whilst mixing and my application of compression is the best it has ever been. 

I only apply a limiter to a mix when I am sending a draft to a client, just so they are able to listen at a more standard volume level. When preparing audio to be sent to a mastering engineer, I always remove the limiter. This is an industry standard for shipping audio material to a mastering engineer as they expect to receive files with a good amount of headroom to work with. It is part of the role of a mastering engineer to apply limiting to a mix and this is where the 'loudness' of a commercial release is achieved.

For the many occasions where I am mastering my own mixes, as many home studio owners also do, I bounce out my entire mix without a limiter. I then master the track in a separate session, allowing me to focus entirely on the stereo audio file with no option to tweak with individual aspects of the mix. I like to think of this as printing or committing to a mix and the only thing I have left to do is add the final polish and make it a cohesive product. 

Try mixing without a limiter on your mix buss and focus on achieving a great mix using your two most powerful tools, EQ and compression. Leave the limiting to a separate mastering session or for shipping our to a mastering engineer. 


I offer online editing, mixing and mastering services, check out www.jwaudioproductions.co.uk and get in touch via the contact page about your project.

Saturday, 28 May 2016

Remember: Mix at low volume levels

The importance of balance has been discussed in an earlier post and in this one I want to talk about completing this process whilst working at low volumes.
We all like to hear everything loud, especially the drums and bass, they have fundamental frequencies we want to feel as much as we can hear but in the context of mixing this isn’t the best way to operate as it can prevent you from accurately balancing, EQ’ing and compressing. Listening to a mix too loud is at the very least a distraction and also potentially damaging to your hearing if listening for long periods of time.
It’s important to balance at low volume levels because you are able to accurately balance your track levels and you’ll also find that you have a better sense of depth and width which is particularly useful for panning and adding reverbs.
Think of it like this…If your mix sounds good at low levels it’s a lot more likely to sound good if not better when it’s turned up. It’s important to realise how easily your ears can be tricked especially when listening at high volume levels and this can be very problematic when using compression. A snare drum or a lead vocal may sound just right when the mix is cranked, so you might not use compression to its full advantage however, you might notice when you turn your mix down, these instruments start to get lost in the mix and aren’t as ‘in your face’ as you first thought. If you focus on achieving ‘punch’ with compression whilst operating at low volumes, you will definitely get a more satisfying result that will translate very well when turned up.
It is also good practice to EQ at low volume levels, but always check your adjustments at higher levels especially with low frequencies as they are much harder to judge when they are quieter.
It’s not wrong to mix at high volume levels but you’ll find that you balance, compress and EQ your tracks more accurately and you will begin to appreciate the quality of your mix if you utilise working at low volume levels. Of course, go between low and high level volumes to check your mix and even just listen to it cranked at the end of a session and just sit back and enjoy your hard work. Take care of your ears for maximum productivity and value being able to mix at low and high volume levels.
If you would like to discuss your project, use the contact page on www.jwaudioproductions.co.uk 

Why you should keep mixing simple

In the mixing world today it’s easy to believe that it’s a complicated process full of secrets and successes that can only be achieved with expensive hardware and software but the fact is – this is totally NOT the case. Don’t get me wrong, i’ve spent a long time having the same belief and thinking “It’s not possible for me to achieve a mix to the standard of Chris Lord Alge, Forrester Savell or Randy Staub without the equipment that they have”, but the reality is that these guys set the standard that they have because they have the experience and have spent a long time honing their craft particularly with the core elements of mixing, balance, EQ and compression.
If you are someone feeling like that right now then this post is for you.
It’s time to take things back to basics, no endless track counts, no complicated channel strips full of plugins that you don’t really need and no infinite amounts of drafts and revisions before you may or may not decide to bounce the track out of your DAW.
Start your next mix with the conscious decision to use 1 compressor and 1 EQ for every track you work on. You ask why? I’m telling you this because i’ve implemented these limitations on myself and i can tell you first hand that it works because you are forced to achieve a result with what you have. By doing this you also remove all the questions going through your head about what plugin you should use, what everybody else is using and what brand has promised you results. It will free up so much of that needed space in your mind enabling you to focus entirely on the one plugin you have available and know that you have to achieve the sound you want with it. I’m not necessarily suggesting that you stick to DAW bundled plugins, but make a decision on a single plugin and stick to it.

As i mentioned in an earlier post, balance is one of the most important things in mixing and this is entirely relevant to the idea of keeping things simple. Start every mix by playing with the faders and pan pots, get the mix to where it sounds best to you and then apply the rest of the core elements, your chosen EQ and compression. If you treat your mix as these 3 core elements then the mixing process will immediately feel easier and more manageable because you are breaking it down into stages which have clear objectives.
As well as setting these positive limitations, this will allow you to become more familiar with the plugins and really understand how they respond to the audio you are working with. Choose the built in EQ and Compressor in Pro Tools, Logic, Reaper, Cubase or go with a plugin you own such as Fab Filter, Waves or DMG Audio. Make this decision and i guarantee that you will achieve results in your mixes faster than ever before and more importantly, you will gain a better understanding of EQ and Compression without the distraction of the hundreds of plugins out there that sometimes we want just because they look good.
Keep things simple in the beginning with mixing because you will truly learn the value of limitations, the principals of EQ and compression and the importance of balance. These are all factors that you will be able to apply to whatever DAW you are using and therefore, make you more versatile as an engineer if you are ever faced with having to achieve a result within a DAW that you aren’t familiar with.